Alien Queen Painting Tutorial

Gale Force Nine alien queen painting tutorial

Greetings! In this article, Alien queen painting tutorial, we are painting an Alien Queen from the boardgame makers at Gale Force Nine. This fearsome apex xenomorph has been the star of pop culture ever since the film Aliens was released. We have mentioned before that black is a tricky color to paint. Shading it and highlighting it can be difficult. How do you make black interesting? And on a large model, with a whole alien brood to paint. So read on to see how I painted them quickly and effectively!

Table of Contents

Alien Queen Painting Tutorial: GETTING STARTED

painting alien queen tutorial black primer stage
A blue-black primer has twofold benefits here.

Step one, I assembled the mini with plastic cement. The mini actually comes ‘easy fit’ but I personally struggle with plug + socket assemblies. Where possible I like to glue to ensure a closer fit. There were minimal mould lines or any other clean ups to do, which was a nice bonus for speeding this stage up. The model came with a sculpted base, too, which I immediately imagined as some derelict space hulk grating. Interestingly, the model came on-sprue in black plastic. This is ideal for boardgame and wargamers not interested in painting. However, if you are like me, you are not here to read about unpainted plastic!

Priming Stage

painting alien queen tutorial black-blue priming stage close up
The cool blue tint is more obvious up close like this.

So, to begin painting we first need a priming layer. Primer helps later stages of acrylic paint stick to the model. You can also choose a priming color that helps with your later colors. For the Alien Queen, there is very little point priming in, say, white or red. Black is an obvious choice. However, the unpainted plastic is also black. 

Pro-Tip: make sure your primer is a different type or finish of black, so you know which areas you have missed! I mixed my priming black color with a little dark blue and purple. This had two benefits. One, it was a different enough from the base black of the plastic. Secondly, as a cold off-black it would be easier to highlight effectively and add interest to.

What do I want to achieve with this miniature?

Gale Force Nine alien queen painting tutorial

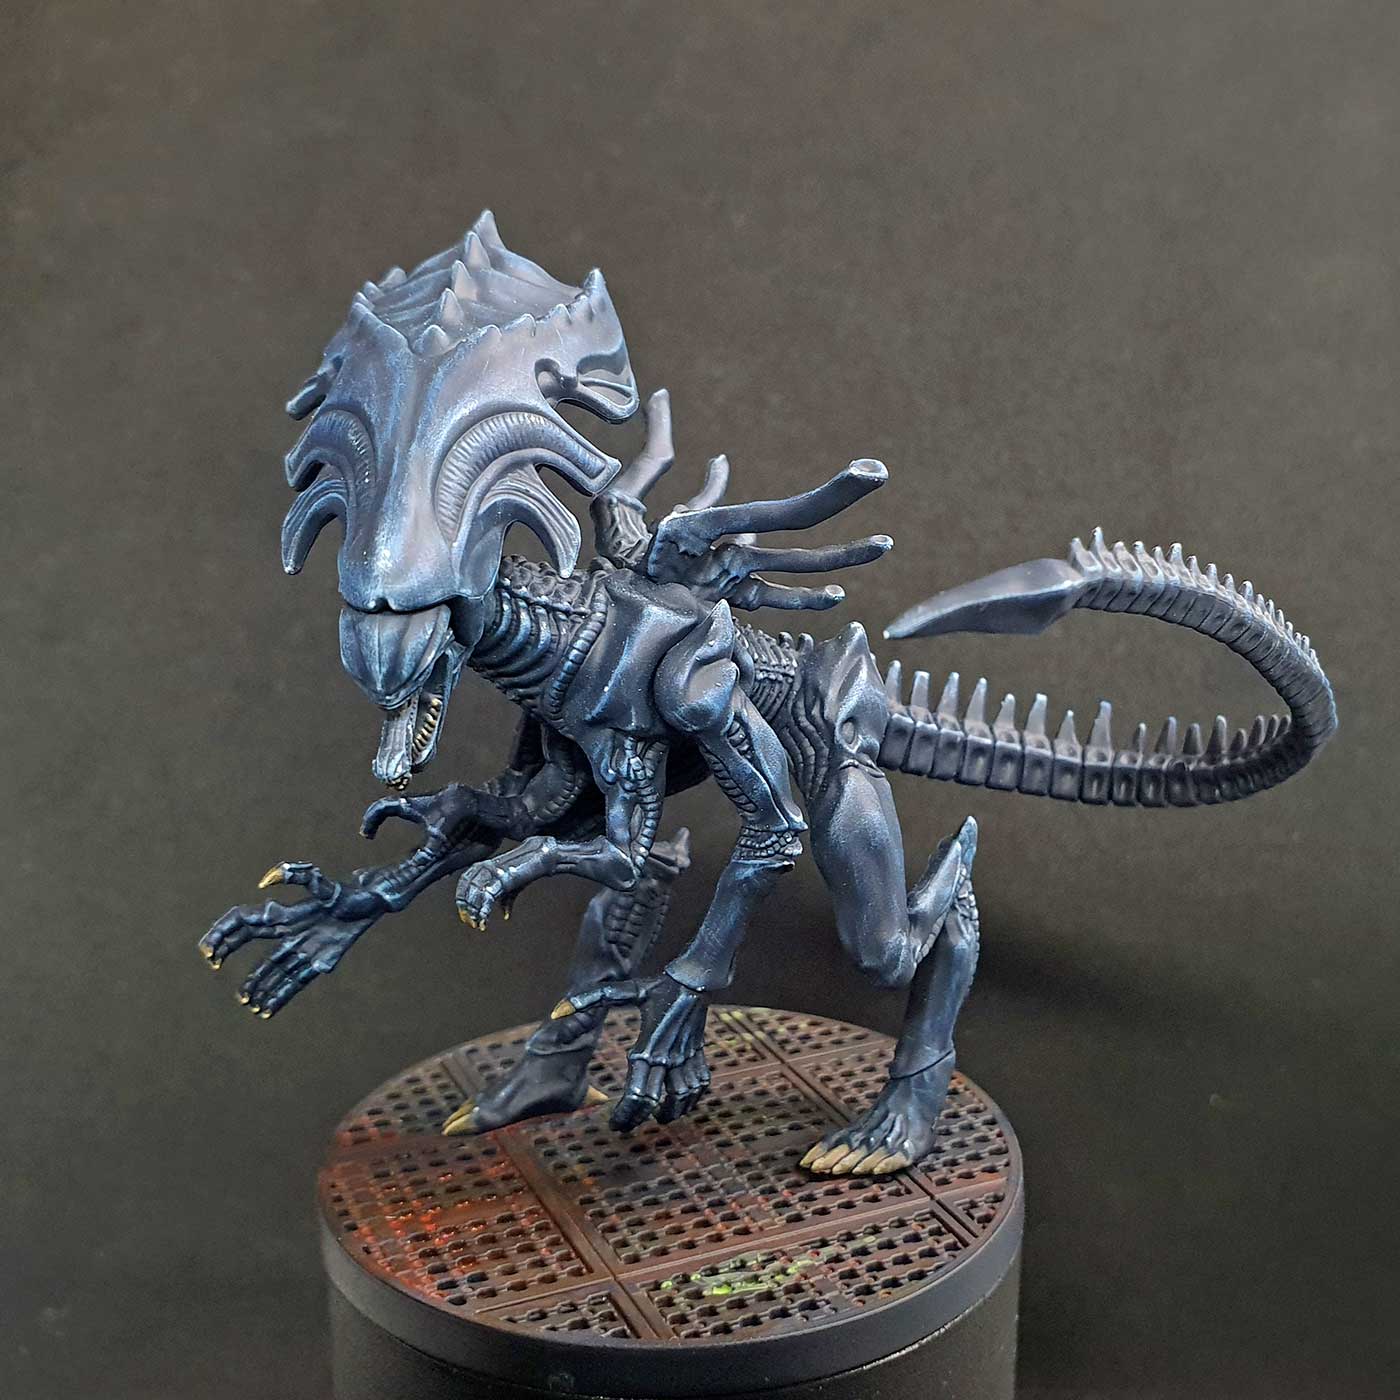
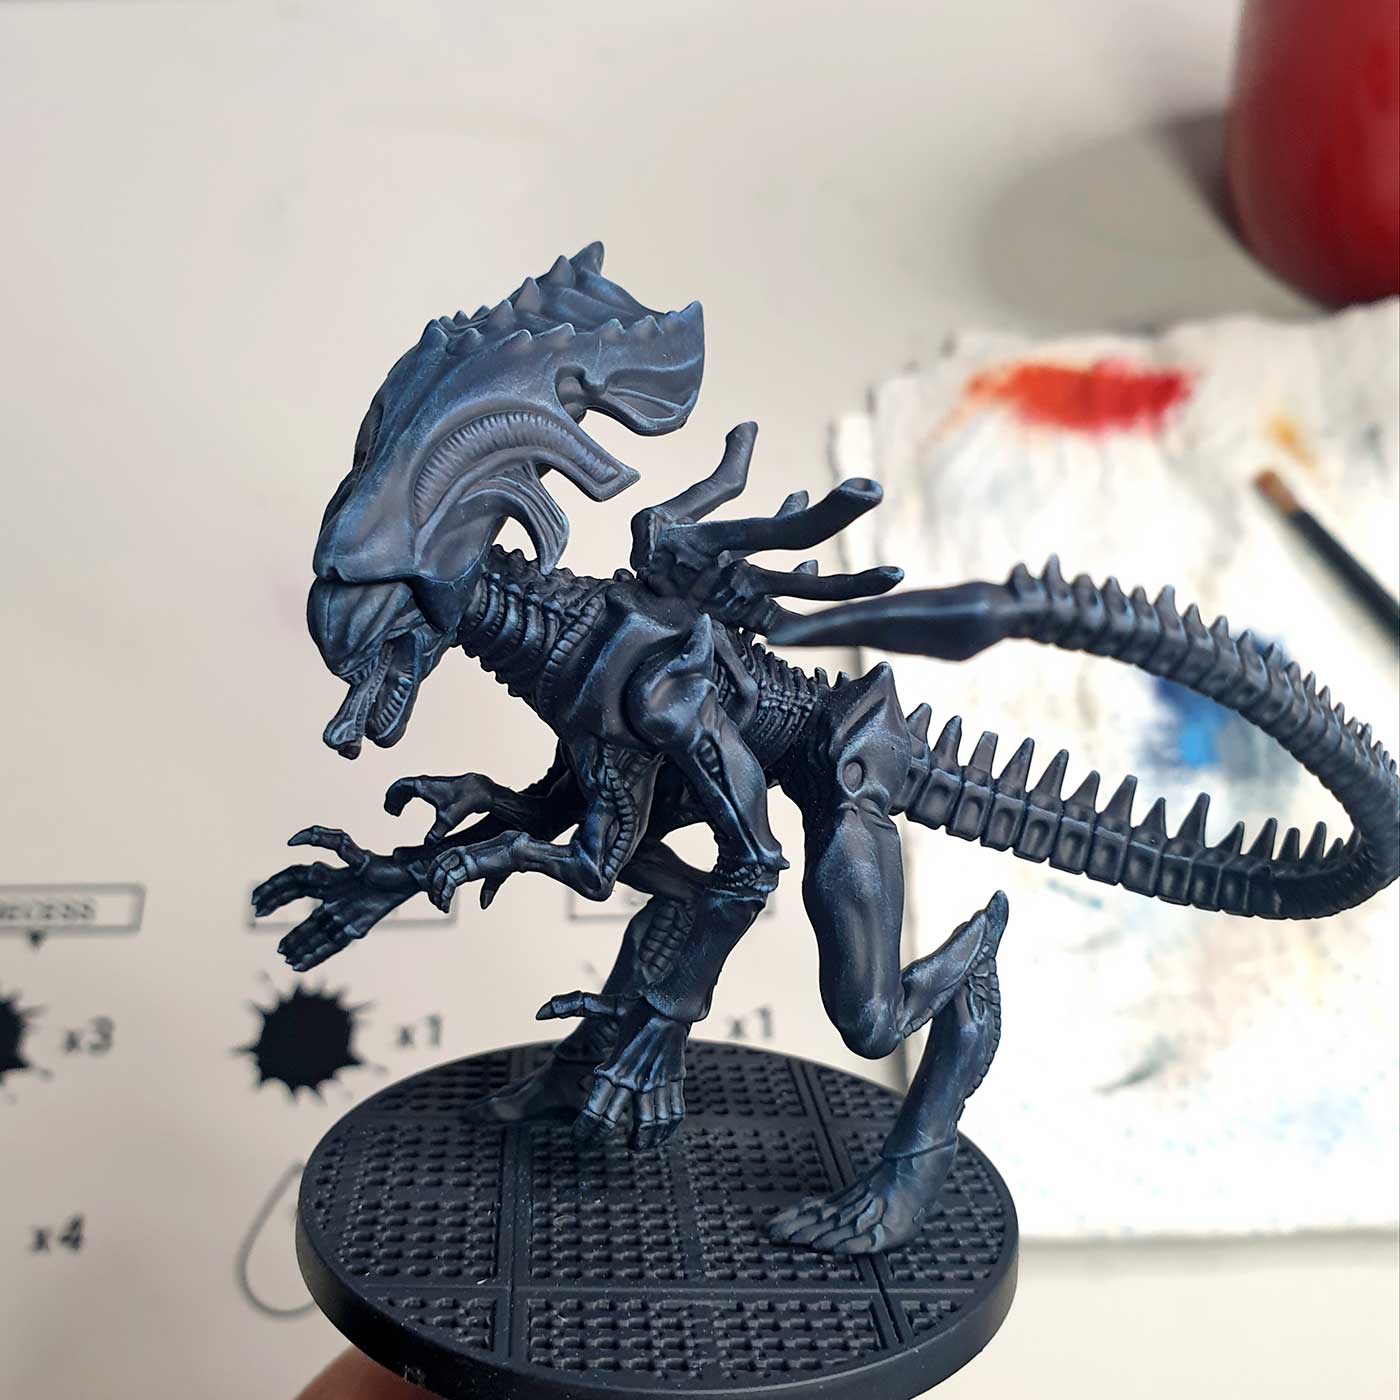
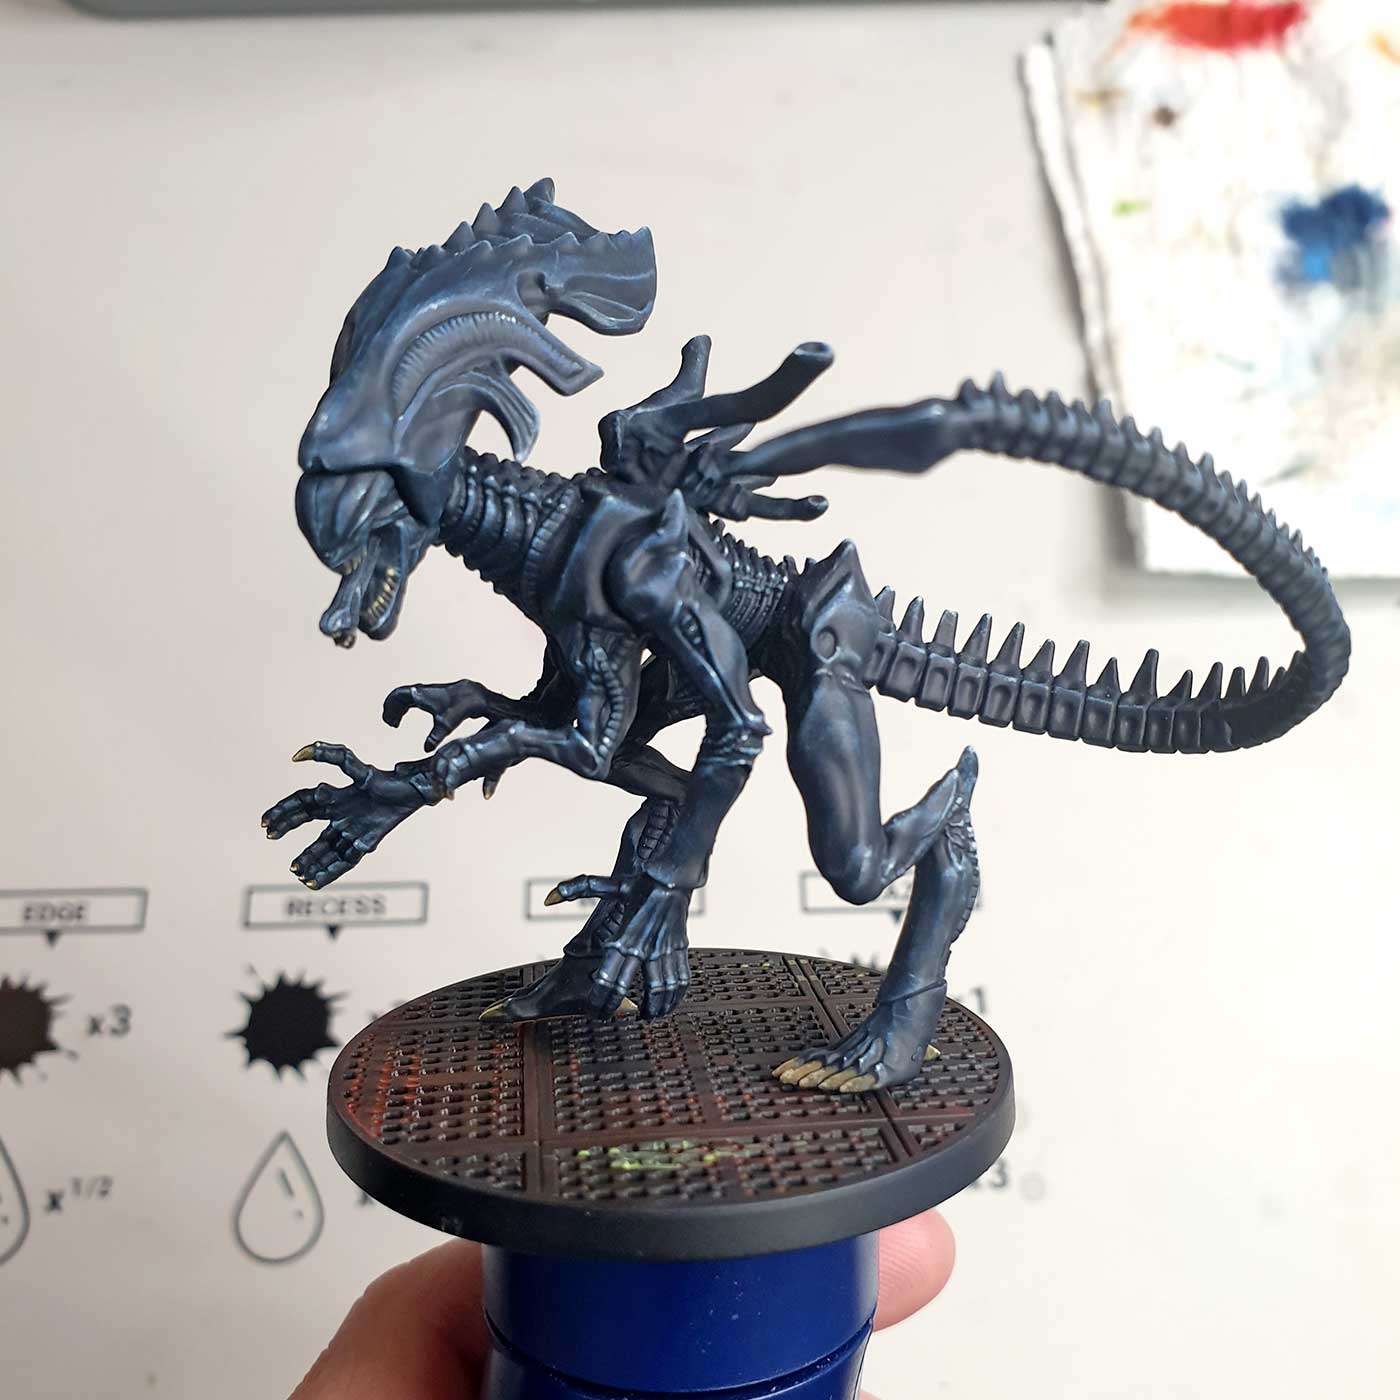
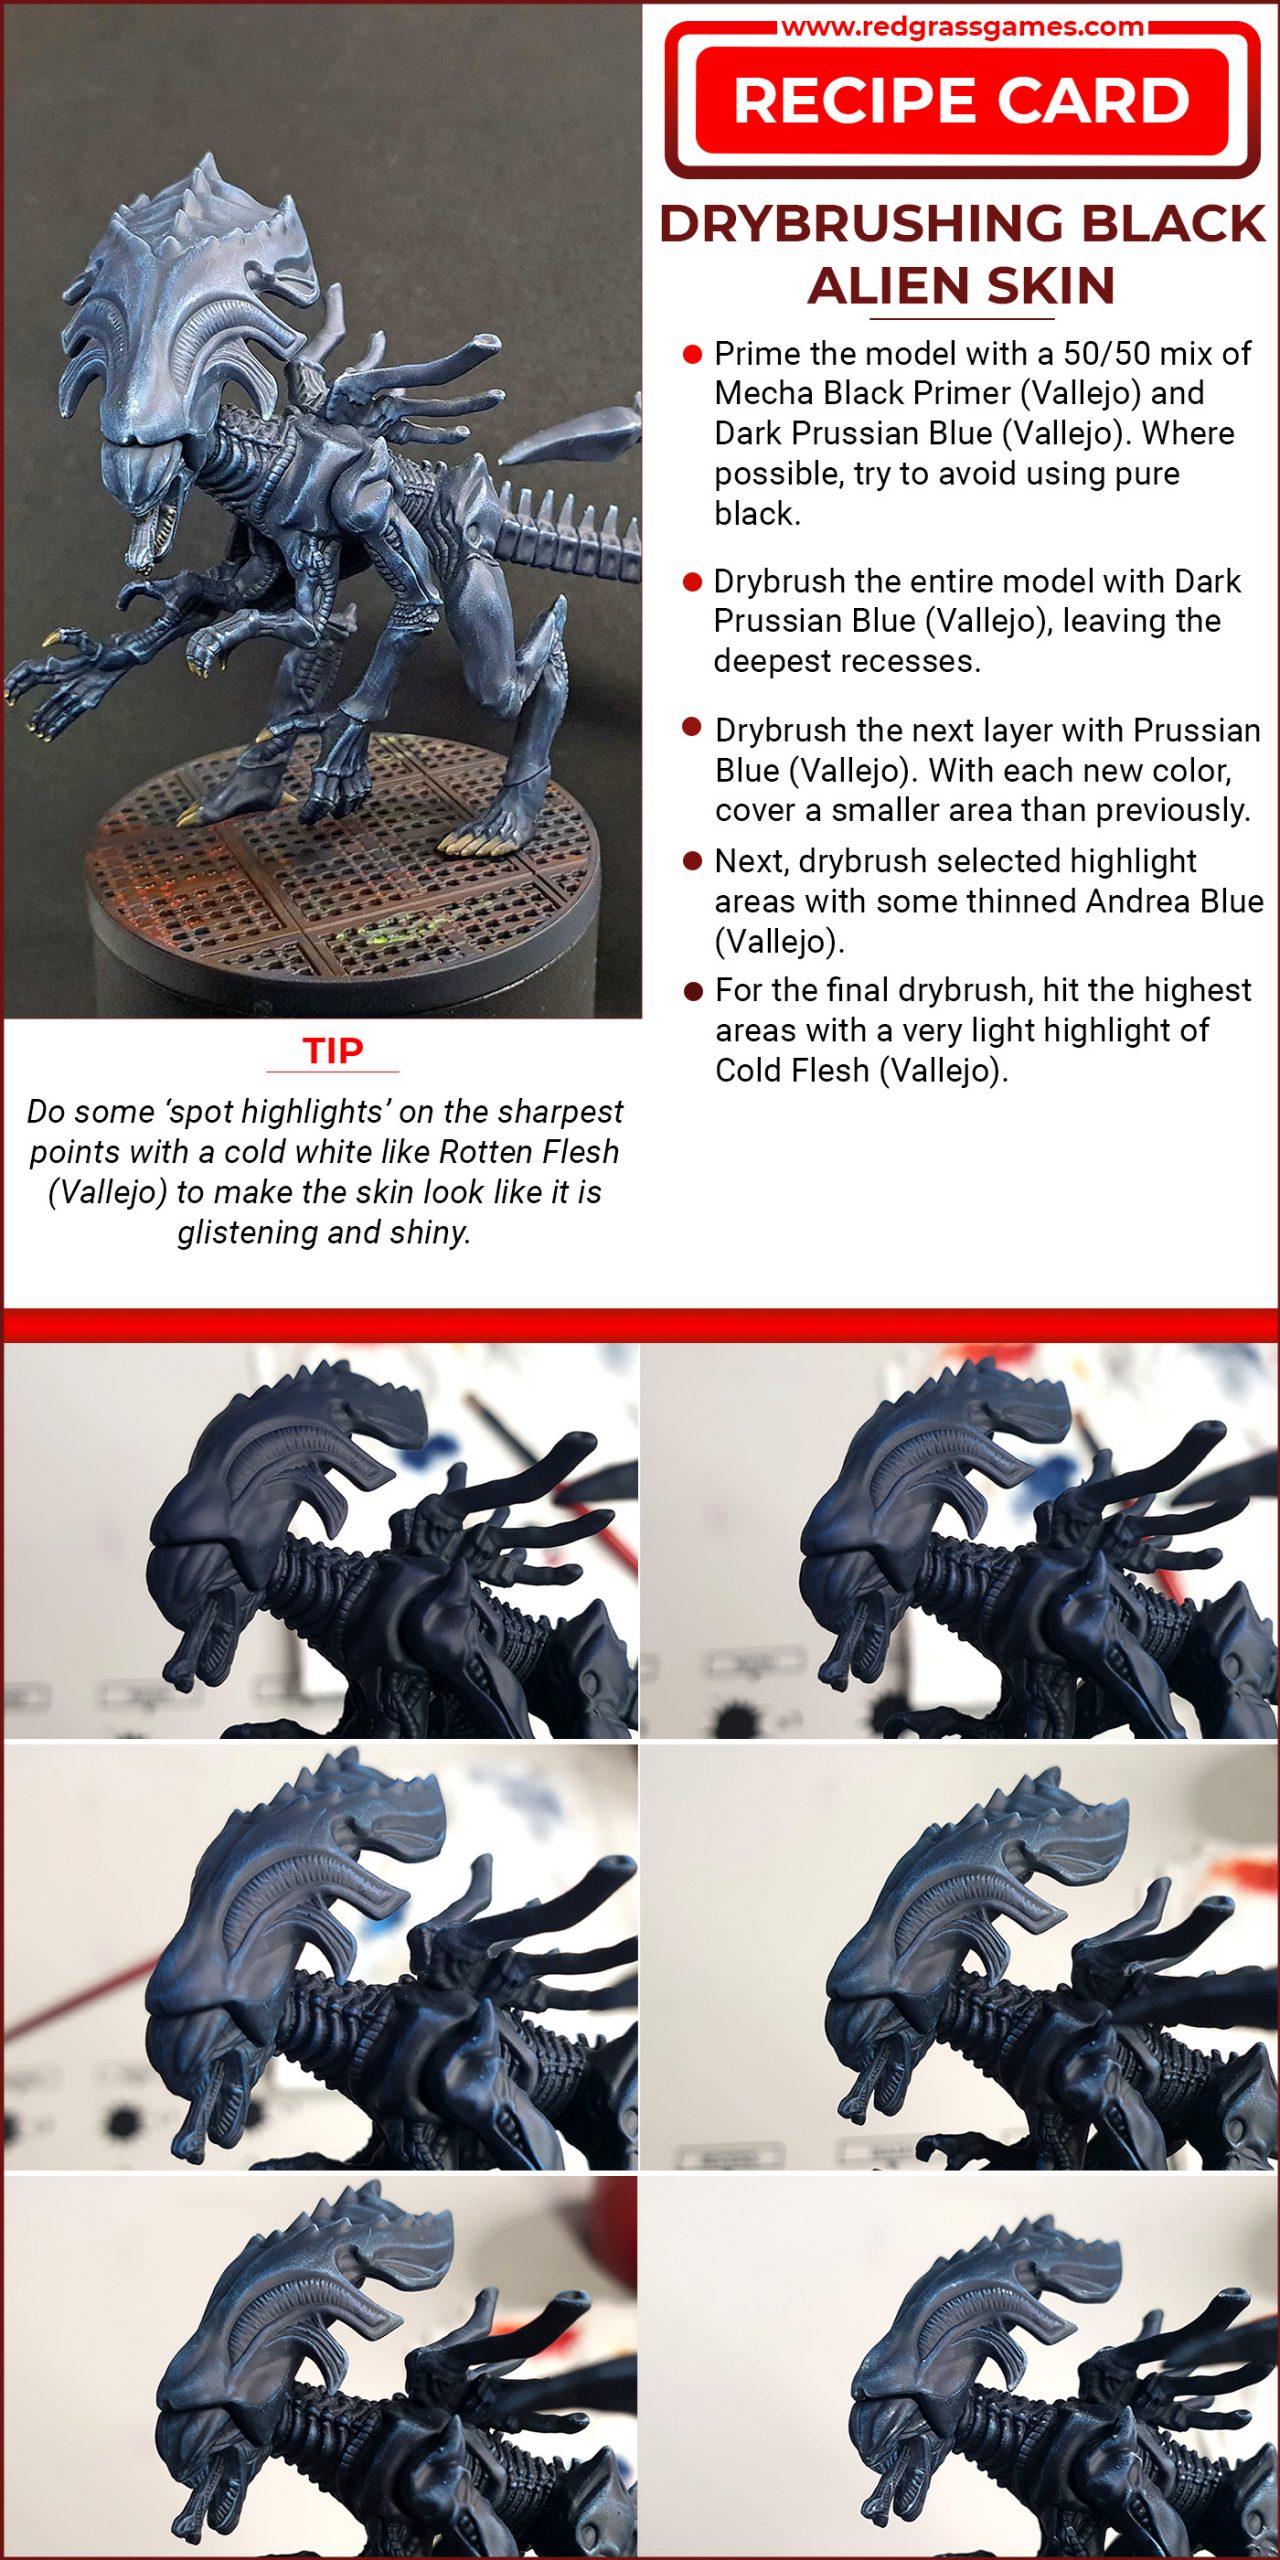
Black can simultaneously be very easy, and also a challenge. Easy, because you could just paint it black and call it done. A challenge, because to make an interesting black you can highlight and shade, you have to avoid pure black. As with any painting project, I made a mental note of my goals and methods before starting. You should too! I wanted an interesting black for the Alien Queen that reminded me of the iconic monster from the film. I also wanted it to be easy to achieve. After all, it may be this scheme that gets copied when painting hordes of Alien Queen soldiers fighting Ripley!

Alien Queen Painting Tutorial: Black

black blue highlights dry brushing process painting alien queen tutorial
Good drybrushing with diffused, successive highlights takes time to build up several subtle layers.

So the key to a good, interesting black, with ease of highlight and shades, is blue. Avoid using a pure black altogether! For all these rounded, organic edges, too, I felt the most pragmatic approach was dry brushing. A drybrush can achieve organic textures and successive subtle highlight layers. Using a dry brush is also user-friendly and rewarding. Plus, attempting to edge highlight all of this would be maddening. This method and color scheme is easily replicable across a whole host of xenos that your gaming demands.

I found that the Redgrass dry brush is a solid ‘workhorse’ brush for most of this paintjob. And a Redgrass dry palette is very useful for a predominantly drybrushed paintjob! I started with a dark Prussian blue color and made sure to work it all over the miniature, leaving the off-black-blue primer in the recesses. A dry brush hit and highlight raised areas, and you can change pressure and angles for different effects. Next I moved to a lighter Prussian blue but without cleaning my brush. To begin with the effects may be hard to notice, but persevere! 

Next Steps

drybrushing highlights second part painting alien queen tutorial
Alien mama getting ready to pop!

Sticking with the same process and same dry brush, I next moved to sky blue. Each time I moved to a new color, I reduced the area I was highlighting. This simulates how light naturally diffuses or intensifies over a surface. This is especially useful for slimey alien carapace! I didn’t want the overall blue to be too vibrant, so I desaturated with my next stage. I used a pale blue-gray as my final drybrush layer. Before I moved on to the spot highlights however, I did wash the base with a rust wash. And I based the talons with tan brown. There aren’t many colors in this scheme, but it is undeniably impactful!

Each time I moved to a new color, I reduced the area I was highlighting. This simulates how light naturally diffuses or intensifies over a surface.

Alien Queen Painting Tutorial: Finishing Details

Lastly is the key details that need highlights. I used my Redgrass 2/0 brush for all the sharpest edges and spot highlights. I used a cold white to ‘dot’ the highest regions and sharpest points. This suggested a slick, alien carapace armor.

The teeth and claws were highlighted with a little pale yellow mixed into the previous tan color. For the base, I added some other reddy-brows, to suggest a realistic rust effect. I also streaked some lime green in patches- to look like the iconic alien acid spit!

last touches xenomorph painting alien queen tutorial black

I used my 00 for all the sharpest edges and spot highlights and a cold white to 'dot' the highest regions and sharpest points. This suggested a slick, alien carapace armor.

Alien Queen Painting Tutorial: Recipe Card

Alien recipe card lowrez

Alien Queen Painting Tutorial: COMPLETED PIECE!

Gale Force Nine alien queen painting tutorial
Where's Ripley with her flamer, when you need her?!

And there you have it! A menacing xenomorph queen ready to ruin anyone’s day. I am overall very happy with how the scheme turned out. The cold blue highlights suggest a terrifying sheen to me. This is perfect for any game board, and also evoking the film aesthetic. I hope this can prove useful to you, even for black schemes that are not necessarily inspired by H.R. Giger! – James.


The Alien Queen is painted using these Redgrass Painting tools

You are currently looking at the website for Switzerland